


Gel Nail Extensions on Forms: How to Sculpt Them, Step by Step
No tip, no fixed shape: a length of gel sculpted over a simple form. How to fit the form, build the apex and avoid the mistakes that make extensions lift or break.
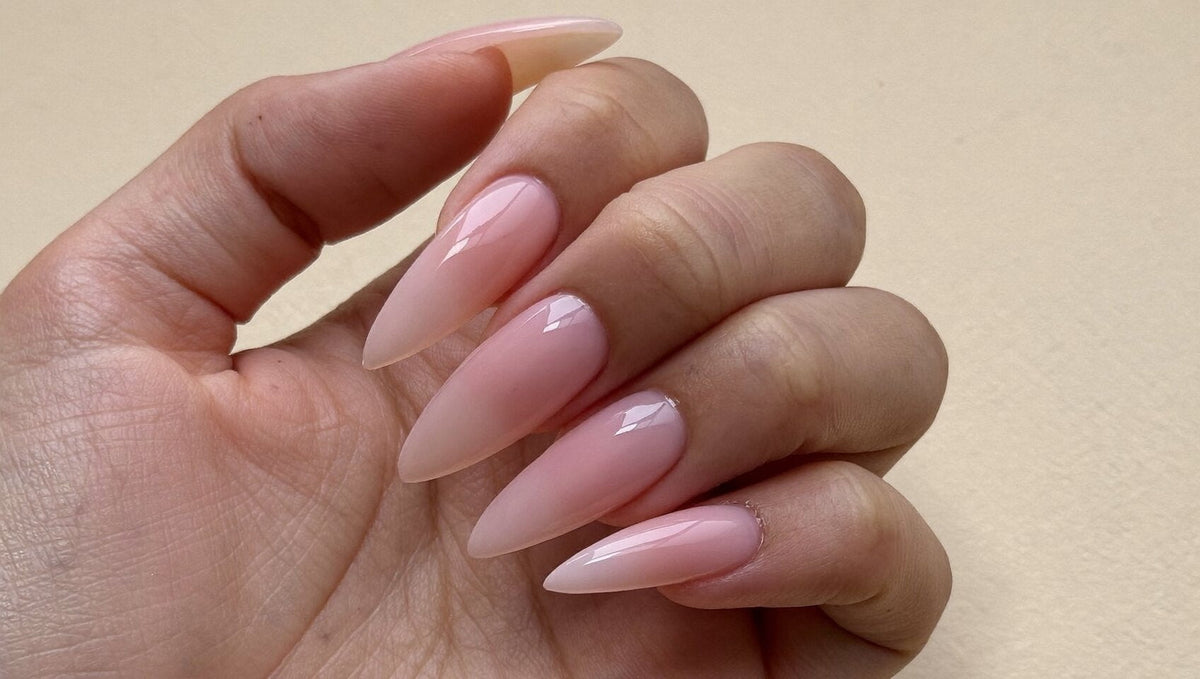
No tip, no fixed shape: a length of gel sculpted over a simple form. How to fit the form, build the apex and avoid the mistakes that make extensions lift or break.

There is a moment every nail technician remembers: the first time a length of gel, sculpted in the air over a simple paper form, turned into a nail that looked as if it had always been there. Extensions on forms are the purest skill of the craft. No pre-made tip, no fixed shape: the length, the curve and the silhouette are built by hand, for one client and one hand only.
The result is lighter and more natural than most tips, and it can be shaped into anything from a soft almond to a long ballerina. Here is how gel extensions on forms work, what you need, the professional method step by step, and the mistakes that make them lift or break.
A nail form is a flexible support, usually an adhesive paper sticker, that fits under the free edge of the natural nail. It creates a platform in line with the nail on which the extension is sculpted in builder gel. Once the gel is cured, the form is removed, leaving a new free edge made entirely of gel.
Most forms carry a printed guide that helps keep the length and the shape symmetrical. The real secret, though, is not the form itself but the way it is fitted.
Many technicians use both, but forms remain the reference for elegant, custom extensions, and the technique that shows real mastery.

An electric file makes refining faster and more precise; our guide to choosing a nail drill explains what to look for. For everything about working with builder gel itself, from the slip layer to self-levelling, see our builder gel guide.

The most elegant extensions are rarely the longest. A length of a third to a half of the nail bed looks natural and wears well in everyday life. Almond and oval shapes are the most forgiving and flatter almost every hand; square and ballerina shapes need perfectly straight sidewalls, and a little more experience.
As the natural nail grows, the apex moves forward and the extension becomes unbalanced. An infill every three to four weeks rebalances the structure: file down the old gel, leave a thin layer in place and rebuild the apex with fresh gel. Between appointments, a drop of cuticle oil every evening keeps the skin and the nail supple, and gloves protect the extensions during household chores.
Read next: Builder gel fill and Builder gel vs acrylic.
Forms are a support on which the extension is sculpted to measure; tips are pre-shaped false nails glued to the natural nail. Forms give a lighter, more natural result.
With good prep and an infill every three to four weeks, they can be worn continuously.
Yes, forms are well suited to short nails, as long as they fit closely under the free edge. Very bitten nails need a little growth first.
A builder gel with a thick, self-levelling consistency. Choose clear to show the natural nail, milky for a soft finish, or a tinted nude to even out the nail bed.
Not when they are applied and removed properly: careful prep, no gel on the skin, and removal by filing, never by peeling.
Discover all our shades in the builder gel range.
Rubber Base Gel: What It Is, How to Apply It and How Long It Lasts
Rubber base smooths ridges, flexes with weak nails and can be worn alone for sheer, natural nails. How to apply it without flooding the cuticles, how long it lasts and how to remove it safely.
10 min read
Christmas Nails 2026: 15 Chic Ideas, from Classic Red to Gold and V…
Lacquered red, velvet, fir green, liquid gold or frosted white: fifteen chic Christmas manicures to shine from the first party to New Year's Eve.
6 min read

Grey Nails: 10 Grey Nail Designs, from Greige to Charcoal
Greige for the office, a misty green-grey, charcoal and a silver cat eye for December: 10 grey nail designs with the steps to recreate them, and how to find the grey that suits your skin.
9 min read
Square Nails: How to File Them, Plus 15 Square Nail Designs
Square nails keep the full width of the nail, so they're strong and made for French tips. Learn to file corners that don't snag, then choose one of 15 designs, from a micro French to long extensions.
9 min read
Free delivery from 75€
Shipped from Nice, France
Prepared in 1 to 2 business days
For orders placed before 2 pm, Paris time
14-day returns
From the day you receive your order
Secure payment
Encrypted checkout
Not sure which shade or product to choose? Talk it through with one of our nail experts.
Book my consultationNail tech, salon or distributor? Join the Elegelli professional programme for pro pricing.


