


Soft Gel Tips: How to Apply Full-Cover Gel Tips and Make Them Last
Soft gel tips give you a full set of extensions without sculpting. Learn how to size and apply them, how long they last and how to take them off without damaging your nails.
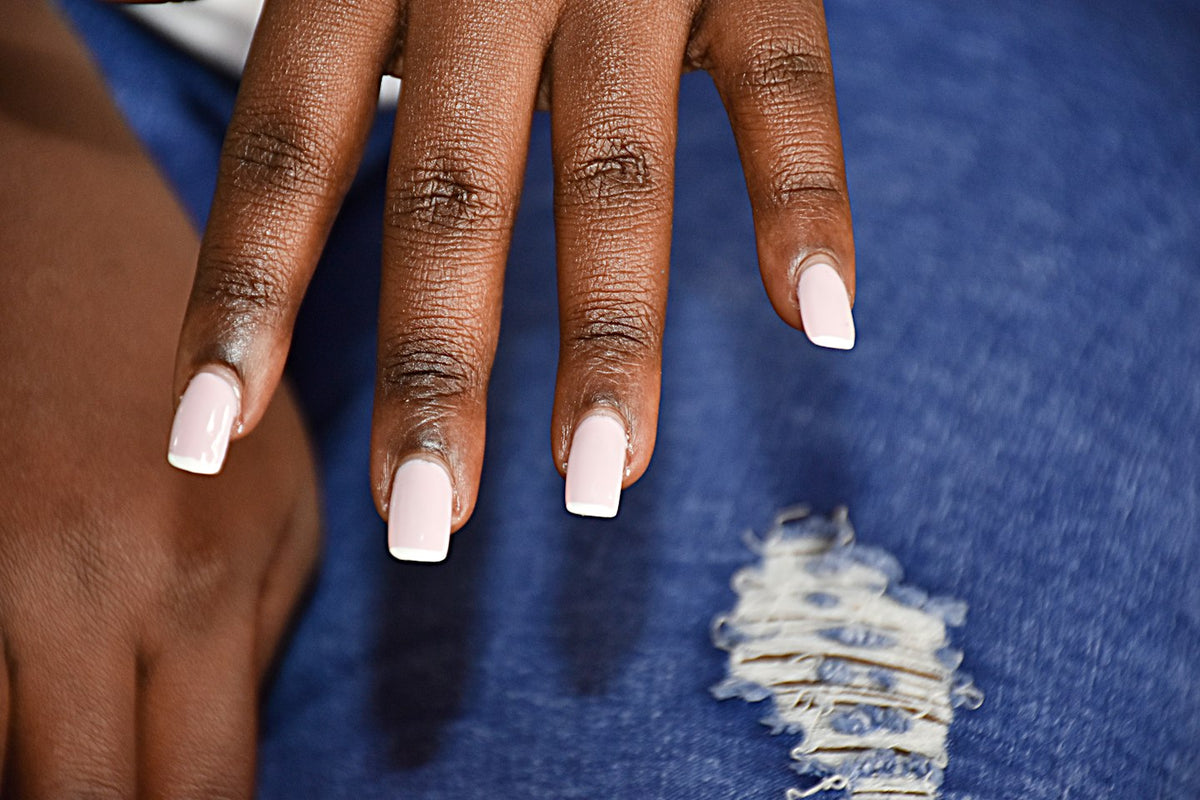
Soft gel tips give you a full set of extensions without sculpting. Learn how to size and apply them, how long they last and how to take them off without damaging your nails.

Soft gel tips are pre-shaped, full-cover nail tips made of soak-off gel. Bonded to the nail with gel and cured under a UV/LED lamp, they add length in one step, with no sculpting.
How well a set wears depends mostly on fit and prep. This guide covers both, then compares tips with forms and acrylic and explains how long they last and how to remove them.
The tips are moulded from soft gel, the soak-off family that includes gel polish, so acetone softens them once the surface is filed. See our guide to builder gel vs hard gel for how soft gel differs from both. A full set is often called soft gel nails, though some salons use the name for any soak-off gel manicure.
They come in boxes of numbered sizes, in shapes such as almond, oval, square and coffin, from short to extra long. Each tip has a built-in curve and a thinned cuticle end, so a well-fitted set looks like your own nails, only longer.
Traditional plastic tips are glued to the free edge only, so they're blended in and overlaid with acrylic or builder gel. Press-on nails cover the whole nail but are fixed with nail glue or adhesive tabs, for shorter wear. Soft gel tips are bonded and cured with gel, and removed like a gel manicure.

Besides the tips, you'll need the gel adhesive your tip maker recommends, a UV/LED lamp, a 180 grit file, a fine buffer and lint-free wipes. Read the maker's instructions first, and follow them wherever they differ from the method below.
Push back the cuticles and remove the dead skin from the nail plate, then file your natural nails short. A long free edge stops the tip sitting flush and shows as a white band through a clear tip. Buff off the shine with a fine buffer, 180 grit or finer, and brush away the dust. Never put tips on a sore, discoloured or loose nail: see a doctor first.
Cleanse and dehydrate each nail with Prep Booster. On oily nails, or nails where gel tends to lift, add a coat of Acid-Free Primer to help the gel adhere. Where your system uses a base or bonding layer on the nail, apply it now, cured or uncured as instructed. From here on, keep your fingers off the nails.
Clip off any extra length, then shape the free edge with a 180 grit file, keeping the side walls straight. The tips are already thin, so buff the surface only enough to remove the shine, then dust and wipe each nail.
Apply gel polish in thin coats, capping the free edge and curing each coat. Opaque shades hide the natural nail beneath a clear tip, while sheer ones let it show. For a milky finish that also strengthens long tips, use a thin layer of builder gel such as B003 Milky White instead, which will need filing off at removal. Finish with Diamond Top Coat, a no-wipe, high-shine top coat, capped and cured in the same way.

On a form, you sculpt each extension in builder gel, so you control its length, curve and apex. That suits nails that tips don't fit, such as very flat or strongly curved ones, but it takes practice. Our guide to gel nail extensions on forms covers the method.
For nails you do yourself, usually yes. Gel adhesive has little smell and stays workable until it's cured, while acrylic needs good ventilation and a quick hand before each bead sets. Acrylic is harder, which can make it the better choice for extra-long shapes and hands that take a lot of knocks. For a full comparison, see our guide to gel vs acrylic nails.
A well-applied set of soft gel tips usually lasts three to four weeks. By then, regrowth has moved the tip's balance point forward, so it's more likely to catch, lift or snap.
Yes, if the set was attached or overlaid with builder gel. File back the colour, then fill the regrowth and rebuild the apex with builder, as shown in our step-by-step guide to builder gel. A set attached with a soak-off gel is normally soaked off and replaced.
With a soak-off adhesive, file off the top coat and colour, then thin each tip so acetone can get in. Wrap each fingertip in acetone-soaked cotton and foil, and wait until the tips soften and lift at the edges. Ease them off from the cuticle end with a wooden stick and rewrap any that cling, because prising them off tears away layers of nail. Oil your cuticles afterwards, as acetone dries the skin.
A set attached or overlaid with builder gel is filed off instead, in stages, stopping while a thin film still covers the nail. For a faster method, follow our guide to removing builder gel with an e-file.
Most lifting starts at the cuticle or side walls, where the tip's edge meets the nail. Early lifting comes from the application: a close fit, careful prep, adhesive with no gaps and a sealed cuticle area prevent most of it.
Later lifting is more often down to wear. Keep your first set short to medium, wear gloves for cleaning, and never use your nails to open cans or peel labels. If a tip lifts, remove and replace it: gluing it back down traps water underneath, which can lead to an infection.
Read next: Polygel vs builder gel and Builder gel fill.
The best soft gel tips are the ones that fit your nails. Choose a range with plenty of sizes, a curve close to your own and a thin cuticle end. For a first set, pick a short or medium length in a shape you already wear.
Yes, if your tip maker allows it. Builder bonds firmly and suits long tips, though the set then has to be filed off instead of soaked. Use a thin layer and press slowly, so it spreads without trapping air.
Yes, and short nails are a common reason to wear them, since the tip supplies the length. The adhesive needs enough nail plate to grip, so on bitten nails, start with short tips and go longer as the nails recover.
Not when they're applied and removed with care: damage comes from heavy filing, prising tips off and leaving lifted tips on. If your nails feel thin afterwards, wear a clear rubber base such as RB01 Rubber Base Transparent for a few weeks. Redness, itching or swelling around the nails means you should remove the set, stop using gel and see a doctor or dermatologist.
Soft gel tips are one of the newer options, giving a full set of extensions in one step. They're still a gel system, though, so they won't suit anyone allergic to gel.
For your next set, browse our primers, top coats and builder gels.
Vacation Nails: 12 Beach and Holiday Nail Ideas, Plus How to Make T…
Turquoise, coral, sea-glass green or a sunset fade: 12 beach nail ideas with the shades and techniques we'd use, and the prep that helps gel hold up on holiday.
9 min read
Classy Nails: 15 Elegant Nail Designs for Work, Evenings and Weddings
Find out what makes nails classy, from shape to shine, then pick from 15 elegant designs for the office, evenings out and weddings, each with its shade and technique.
10 min read

Summer Nails: 20 Summer Nail Designs and Colours, from Neon to Turquoise
Neon pink over white, turquoise with coral, gold on a tan or a lemon on one nail: 20 summer nail ideas to paint in gel, with the shade, steps and skin tones for each.
12 min read
Nail Technician Equipment: The Complete Checklist for Beginners (2026)
Workstation, hygiene, tools, lamp, e-file, prep, bases, colours and top coat: the complete equipment list for new nail technicians, and what can wait.
5 min read
Shipped from Nice, France
Prepared in 1 to 2 business days
For orders placed before 2 pm, Paris time
14-day returns
From the day you receive your order
Secure payment
Encrypted checkout
Not sure which shade or product to choose? Talk it through with one of our nail experts.
Book my consultationNail tech, salon or distributor? Join the Elegelli professional programme for pro pricing.


